Flow helps you design the remaining pages of a product once the visual style is confirmed. Use it to build complete user journeys—such as checkout, onboarding, or account flows—while keeping a consistent design system.Documentation Index
Fetch the complete documentation index at: https://docs.superdesign.dev/llms.txt
Use this file to discover all available pages before exploring further.
How to Access
- Select a page or frame (this becomes the source style)
- Click Create New → Flow
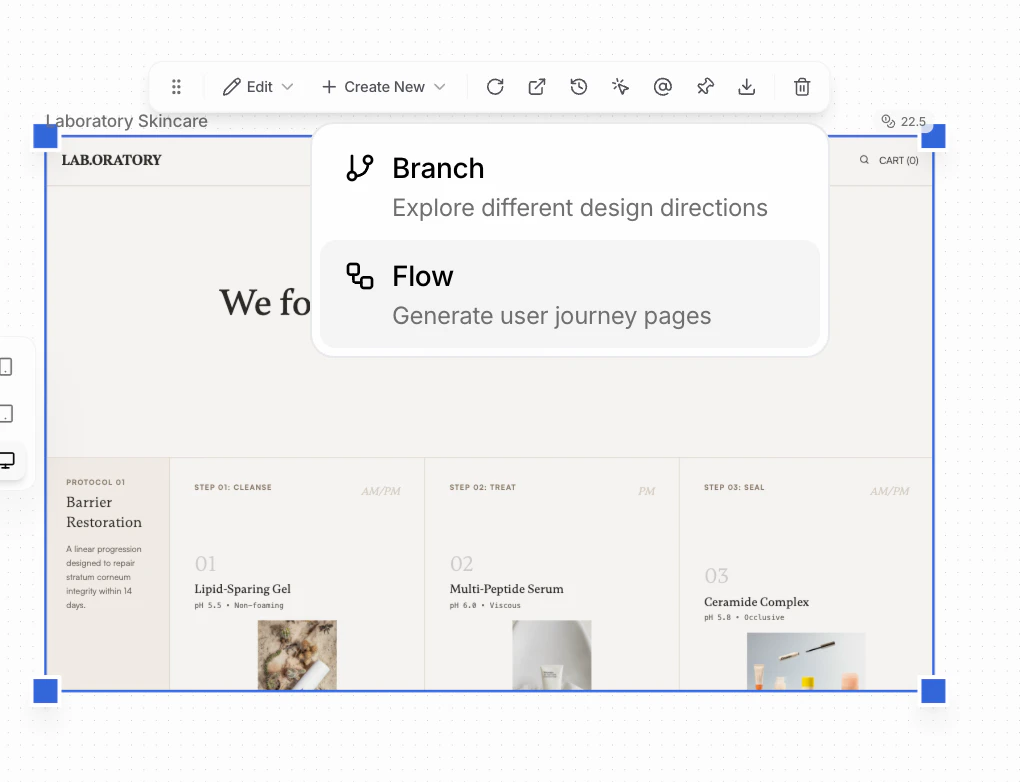
Define the Journey
Overall Flow Context
Start by describing the journey you want to build. Ecommerce- “Ecommerce checkout flow from cart to order confirmation”
- “Product discovery to purchase flow for skincare brand”
- “Guest checkout flow with express payment options”
- “New user onboarding flow from sign-up to first success”
- “Pricing page → upgrade → payment → confirmation flow”
- “Trial user conversion flow”
- “Seller onboarding flow from account creation to first listing”
- “Booking and payment flow for service marketplace”
- “Account setup and profile completion flow”
- “Password reset and security update flow”
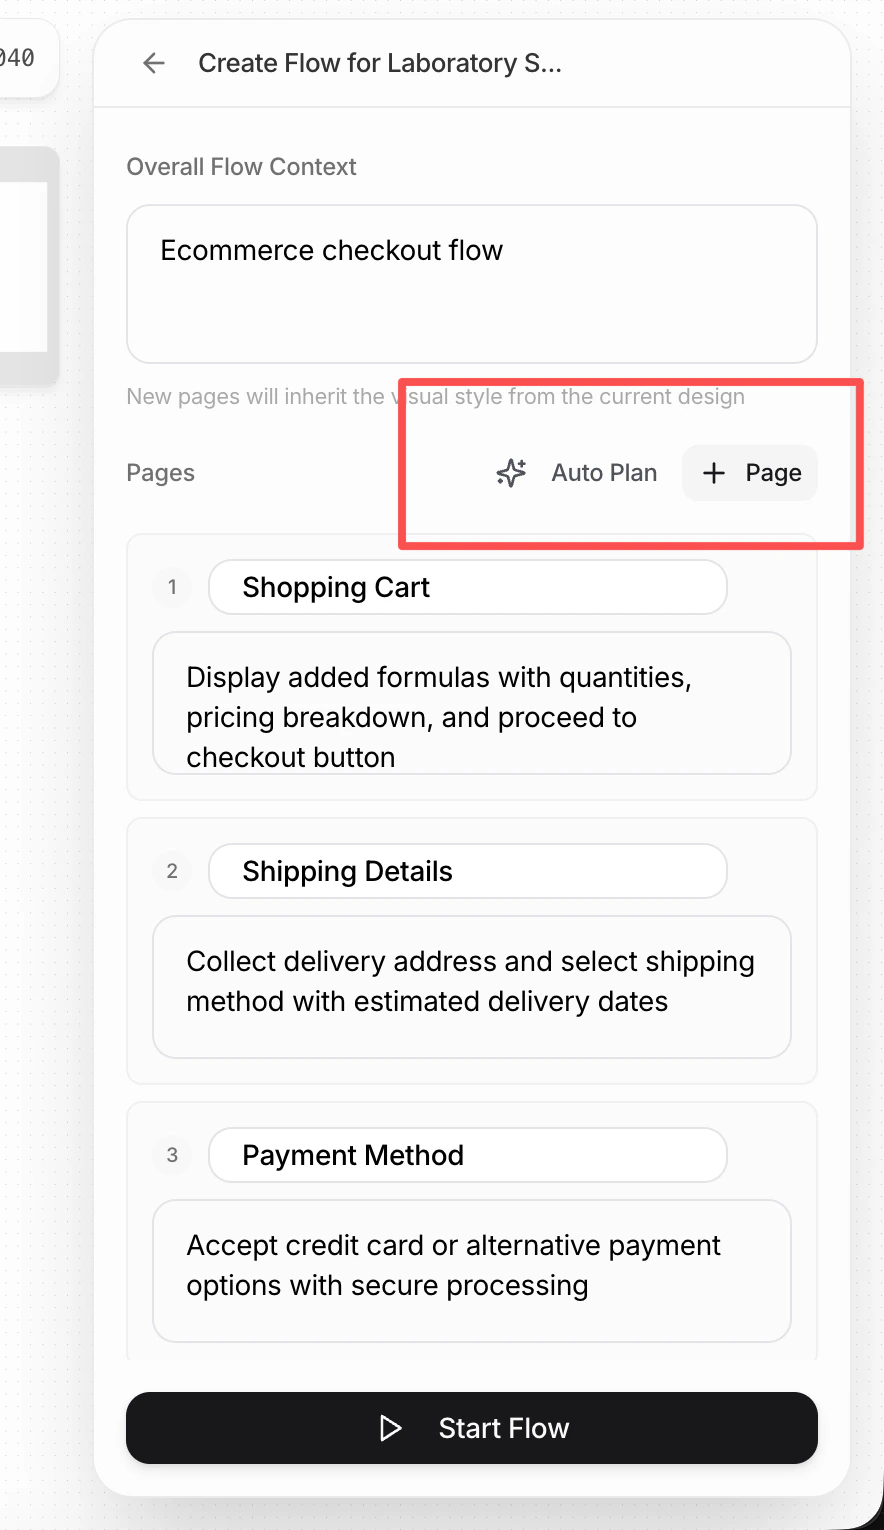
Plan Pages
You have two ways to define the flow:Auto Plan
- Click Auto Plan
- The agent will:
- Design the full journey
- Decide which pages are needed
- Propose layouts for each page
Manual Pages
- Click + Page
- Define each page yourself:
- Page purpose
- Page layout
You only need to specify the layout here. Style automatically follows the source page where the flow was created.
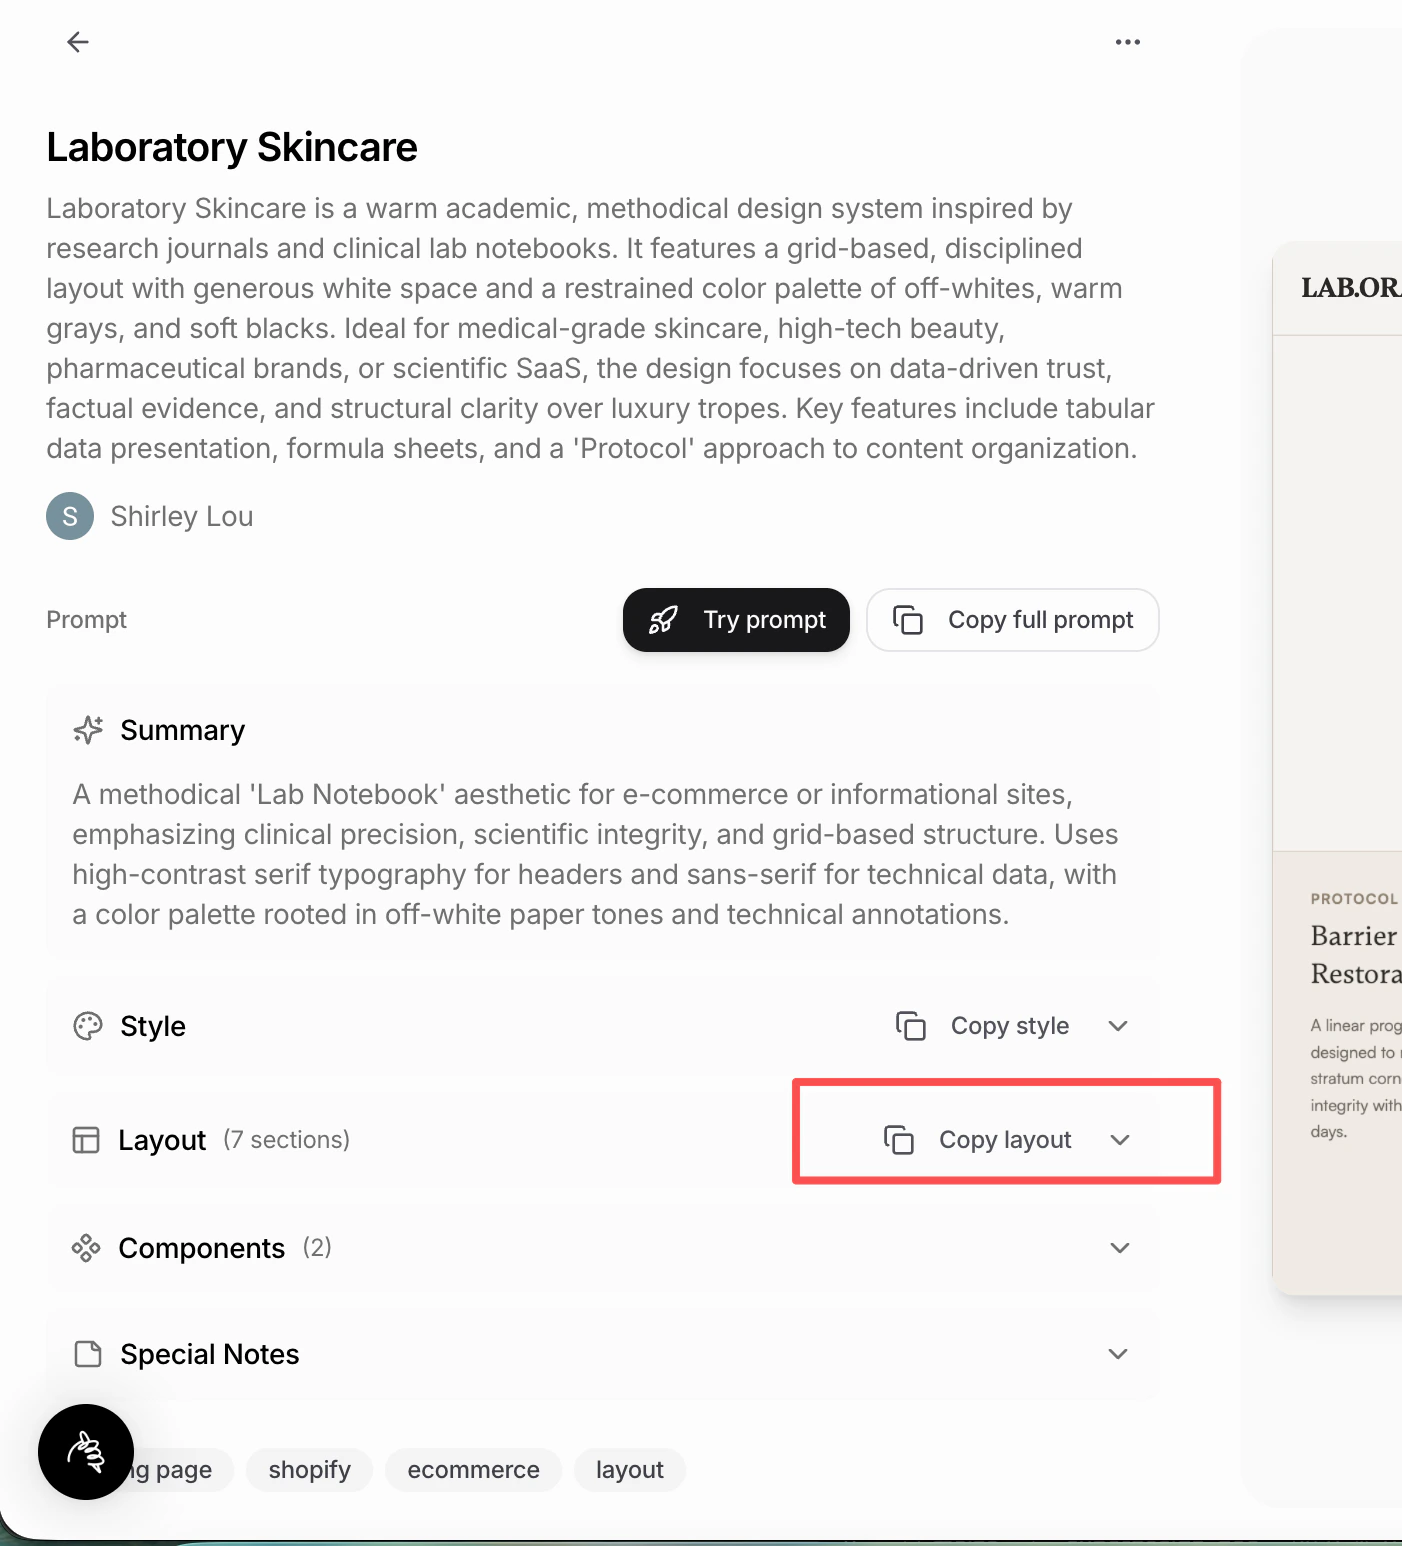
Using Layout Inspirations
You can reuse layouts from the Superdesign Prompt Library:- Go to: Superdesign Prompt Library
- Find a page you like
- Click Copy layout
- Paste it into the Flow page definition
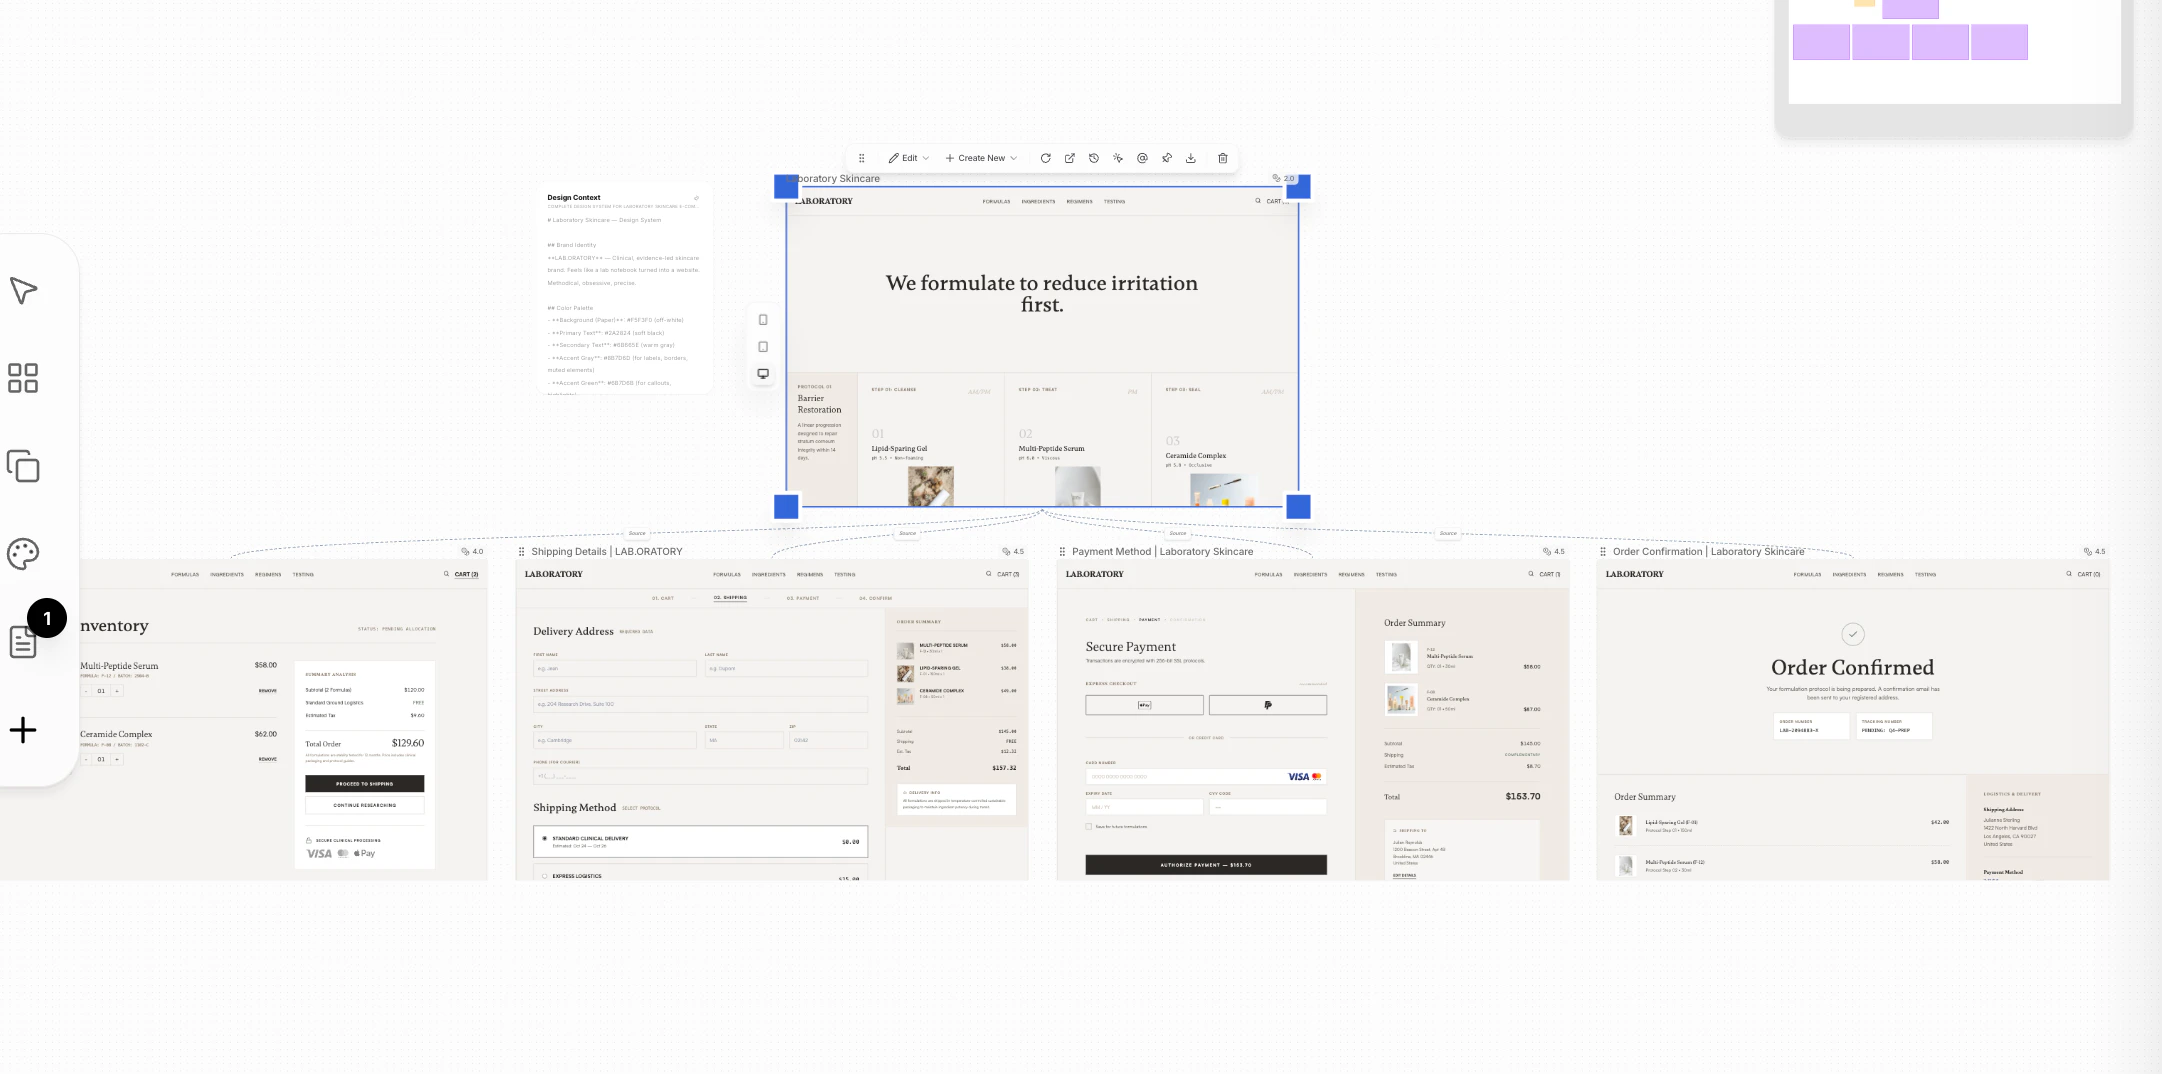
When to Use Flow
Use Flow when:- You’ve locked in a visual direction
- You want to design connected pages beyond the landing page
- You need consistency across a full user journey
Flow focuses on structure and journey, not visual exploration—that’s what Branch is for.